Photo / Diagram Tutorial: Double Estonian Cast On
A while ago, I made a photo tutorial for the Estonian Cast On. The Double Estonian Cast On is a simple variation of this. The edge is thicker and more decorative. It is ideal for 1 x 1 and 2 x 2 ribbing, as it wraps the base of the ribbing columns. It is firm, but stretchy - this makes it a great cast on for socks.
My Little Duck socks that I blogged about last week used the Double Estonian Cast On.
The actual cast on is the same for both the single and double Estonian Cast on. It's just the starting bit that's a little different.
- As for any long tail cast on, measure out a long tail. I tend to use 1 inch per stitch for thicker yarn and 1/2 inch per stitch for DK weight and thinner; plus another 6 inches for luck!
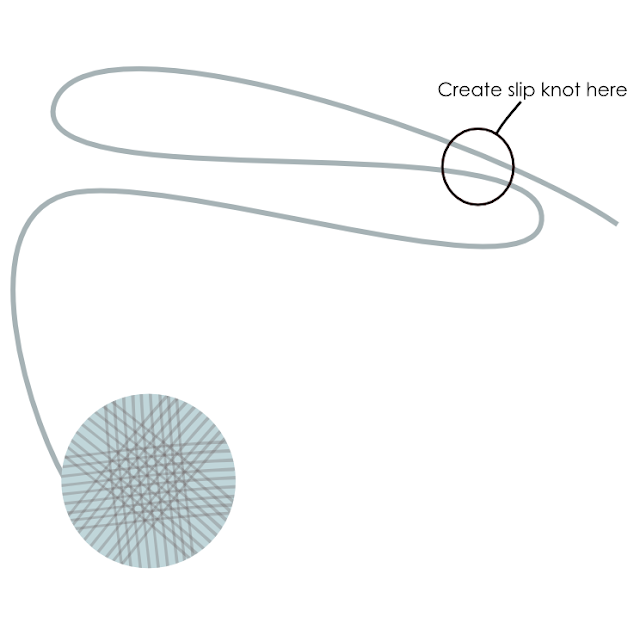
- Instead of making a slip knot, fold the yarn again to the same length that you've measured. You should have 3 lengths folded instead of 2 for a long tailed cast on. Leave a bit extra at the tail end for sewing in the end.
- Make a slip knot about 6 inches in from the tail, using two strands. This will leave two loops on your needle.
- It should look something like this before you put it on the needle.

- And look like this when it's on the needle.
And real life photo to show you what it should look like. - The double stranded part should be at the front of the needle and goes around your thumb and the strand attached to the ball goes around your forefinger.
- The double stranded slip knot counts as 1 stitch only
- Place your hand into the sling shot position (like a long tailed cast on) but wrap the thumb yarn clockwise around your thumb.
- Insert your needle into the loop on your thumb from top to bottom
- Reach across over the top of the strand on your forefinger.
- Scoop this loop back through the loop on the thumb.
- Drop loop from the thumb and tighten stitch onto needle (again, not too tight). There should be a bar across the base of the cast on and the stitch just made.
- Place your fingers between the strands and tilt your hand back into a catapult position. This creates a cross on the thumb strand (the yarn goes anti-clockwise around your thumb).
- Insert your needle into the loop around your thumb from below.
- Reach across over the top of the strand on your forefinger.
- Scoop this loop back through the loop on the thumb.
- Drop the thumb strand and tighten the stitch onto the needle (not too tight though). You may recognise the previous steps, as it's the same as a regular long-tailed cast on.
I'll repeat the original tutorial now. Though it will be slightly different because to make the wraps sit at the base of 2 x 2 columns, the first stitch needs to be done with the yarn wrapped clockwise first. The original tutorial was based on a 1 x 1 where it doesn't matter which way you go first ( so apologies for the photos having an extra stitch on them ).

Repeat steps 1-10 until you have your required number of stitches. Remember, the two loops for the slip knot count as 1 stitch.
For a sock, make sure you have the wraps on the right side of the work. This means that if you normally join in the round by swapping the first and last stitches, then the work will be facing the wrong way.


The Information that you have shared was really very useful to us. If anyone wants to know about tailoring softwares I think this is the right place for you!
ReplyDeleteTailor Master Required | Tailor App